Home »
Android
How to Install Android Virtual Device (AVD)?
Guide to Install Android Virtual Device (AVD): In this tutorial, we will learn how to install and set up Android Virtual Device (AVD) on Windows.
By Shamikh Faraz Last updated : June 06, 2023
What is an Android Virtual Device (AVD)?
Android virtual device is used for displaying the output of app. This is also called 'Emulator'.
Installation Android Virtual Device (AVD)
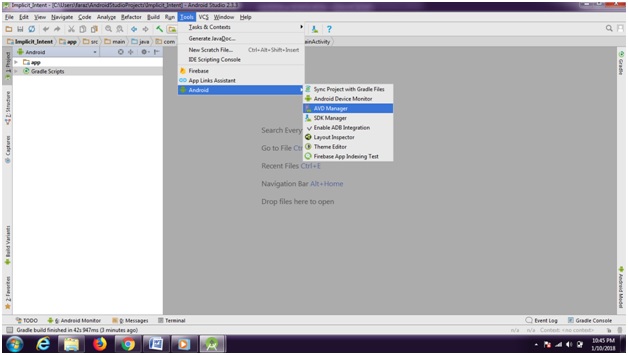
Step 1: Click on 'Tool → Android → AVD Manager'.

Step 2: Click 'Create Virtual Device'.

Step 3: Select your target device i.e. which size of mobile screen you wish to use for display of your app.

Step 4: You can select anyone of these. But generally we prefer devices with 5 inch screen. Click on 'Next'. You can download more than one virtual device. But installation will be one after one.

Step 5 - a): Download the android operating system for Android virtual device. Select anyone of these. You can download all. But download will be in a sequential manner (one after one).

Step 5 - b): You can also select other than these OS by clicking on 'x86Image', neighbor tab of 'Recommended' tab (This is optional, step 5a is sufficient). After selecting anyone, click 'Next'.

Step 6: Click 'Finish', as download finishes.

Step 7: After the installation of Android virtual device, your device will show in the list. You can watch this by clicking on Step 1: Click on 'Tool → Android → AVD Manager'.

Note: you can add more than one android virtual device as per your choice/requirement. These can be add/delete/edit at anytime. After adding more than one virtual device your virtual device window will show a list. For watching the output of your app, you can use anyone of these.

Advertisement
Advertisement